Monday, September 28, 2015

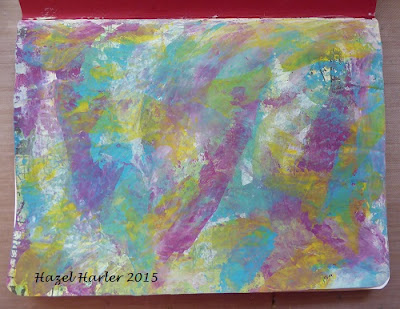
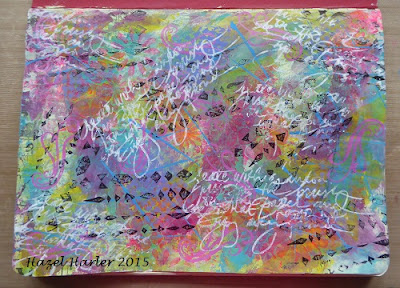
Lots of leftover layers !!!

I was fortunate enough recently to be able to attend a class with the fabulous Birgit Koopsen, I love everything Birgit does and was super excited to be in her class. 

We covered lots of different techniques in the two days and not wanting to waste a single bit of paint or collage element I had my art journal on hand to mop up all the extras. 


I mopped up paint, I used off cuts of Gelli prints, pieces of painted deli papers, pieces of gelli printed packing tape !!
I didn't worry about how they were arranged on my journal page, I was just quickly throwing them down onto the page so they didn't go to waste !!

When I came home from my weekend away I had a fabulously rich and luscious ready made background to play with.....


I never go to any classes now without my mop up journal....

You just never know what those left overs will allow you to create

Bright and painty hugs
Tracy
Xx

Wednesday, September 23, 2015

Print Challenge

I often work on more than one piece at a once. These are a series of prints I made  as part of  a "Print Exchange".


  These 5" x 7 " works were created on the Geli Plate.Layers of stencil and stamped imagery  were then added to give depth. Because they where all worked simultaneously there is a repetition of pattern and form within each unique piece. I hope you will rise to the  Multi tasking  challenge!!!! 
Linda

Monday, September 21, 2015

Art Journal Monday

Good morning all, Hazel here sharing a journal page with you. This page was inspired by Jenni Niemi, I've been watching her videos on You Tube.


I started by spreading acrylic paint over the page.


I did some stencilling and stamping over the page.


Then I drew the face and stamped some flowers.


I painted round the face and flowers leaving the background showing, then I painted the face.


I coloured round the face with Faber-Castell Pitt pens and did some doodling round the flowers and on her hair. I stamped some small flowers and script on the background, I also added some shading to the face.


I must admit that I'm pleased with the result as it's the first face I've done. I hope you like it.

Thank you for looking.

xxx Hazel.

Wednesday, September 16, 2015

Apple For The Teacher

Hello everyone, Barb here, to share a little “How To” with you.  It is not to early to start thinking about gifts for teachers for the upcoming holidays or for just any day.  I don’t think we can say thanks in enough ways to the educators of our youth. 

Our challenge this month is back to school with book pages as the added element.  I chose to alter a small recycled jar (the jar could be filled with many different things).  Wash your jar very well and let it dry. 


I covered the jar with strips of book pages which were adhered with gel medium.  After they dried I brushed on a coat of clear gesso.  I was thinking I wanted the words to show through from the page pages.


 I then painted a layer of red paint.  After that dried, I sponged on two different reds to give the color more depth. 


Now to add the finishing touches.  I left the lid the color it was which was a goldy brown.  I colored a piece of wood that looked like a knob dark brown to represent the stem.  I adhered two layers of book pages together; cut out two leaves freehand and colored them with green ink.  A touch of brown ink was added also.  I took a piece of brown twine, doubled it, wet it with gel medium and wrapped it around a pencil so I could get the curl in it.  Once it is dry remove it carefully from the pencil.  I wrapped natural twine under the lid; tied a bow, and added a tag with thanks stamped on it. 


I do have an artistic conflict going on.  Should I leave the jar as it is or should I brush shiny modge podge on it so my apple shines.  What do you think?


Monday, September 14, 2015

Share all the details!

Hello and Happy Monday to you all! Lucyna here! It's time to share my journal page today.
I used to live in a small town where gossip was the favourite activity of the citizens.
I have visited the town recently and found out that nothing has changed in this subject.
It was my inspiration for this page.


I started with priming the page with gesso and painting it with blue acrylic paint.


I glued the images from the paper.


Next step was to add some modeling paste using ,,the wall" stencil.


I used my fav gelatos to add some colour.


Finished the whole piece with some outlining and  inscription.


Wednesday, September 9, 2015

Back to School

Well I think most kids are back to school.  The summer did go very fast though and I was sad to see the kids go back!  But at least it's almost fall even though it's been in the 90s here the last few days!  

Have you played along with the September challenge yet?

Our theme this month is Back to School and our Twist is Book Pages!  

Here is a tag I made for the current challenge:


This is a large Ranger manila tag.  I started the tag with book paper, I used a gel to adhere and seal it down.  Then using Dylusions Paints by Dyan Reaveley for Ranger I in a color block fashion painted the background.  Then I pulled out stamps and stencils and went to it.  Finally using some Unity Stamps and Sweet Stamp Shop stamps I added the images on the front.  Finally Stickles was the way to go to add some glitz!


I hope that you will come and play along with our challenge for your chance to be our next guest designer!  

Till next time!

Maria

Monday, September 7, 2015

Journaling

Barb here - I have posted several pages that I made in the classes I took with Dyan Reavely.  I am sharing another page we made in class.  She always does two pages at once.  This is the second page.  We were working on a page and laid a stencil over the top.  We sprayed with black ink.  You then very carefully picked up the stencil and turned it upside down on a blank sheet.  All the black ink is on your page.  I had a nice road map which is what it looks like.


All the colored spaces were blank journal page color.  I added color with Prismacolor colored pencils and gamsol to get a soft finish on my coloring.  Here is a close up.


As you can see I did some profound journaling on my lines.  I did the alphabet and then some lines will say "now I know my ABC's, won't you come along and sing with me".  I also doodled in all the black spaces.

It was a fun project to work on.  I was away from home so it was something I could putz on whenever I had a chance.

Hope you enjoyed my page and my learning how to make journal pages and how to journal.

Tuesday, September 1, 2015

Vintage Newspaper Collage

  I found an old " Cornish Telegraph" dated 1922 in a charity shop, of course I had to have it!!


  •   After I collaged some of the pages together I cut out some flower shapes.


  • I used " Filigree fluid" to create a raised impression around each flower head.Then added washes of colour.


  •  I decided I wanted to make 3 panels .
  • More detail was added with leaves and and lots of random stitching.
Until next time Thanks  Linda

September Challenge

It's the beginning of a new month once again!  I can't believe how fast the summer flew by and we are getting into fall very soon!

Thanks to everyone who played along in August with our Anything Goes challenge!!!  Our Mixed Media Mojo Diva and next guest designer is:


Here is her super cool creation:


I hope you will come and play along with our back to school theme this month!

Check out what our wonderful Design Team has made this month:


Please link up below a new project created for this challenge and do not combine with more than 6 other challenges.  Limit to 3 entries per person. You can be the next Mixed Media Mojo Diva and our Guest Designer for October!

Be sure to check in Monday's and Wednesday's for Art Journal and Mixed Media Inspiration! 

Thank so much for stopping by! I can't wait to see what you create!